Before Gmail became the email giant, Hotmail took care of the email needs of the common man. It was one of the first web-based email services to provide free email accounts and data storage. Acquired by tech giant Microsoft in 1997 and rebranded as MSN Hotmail, it continued to gain traction for another decade until Gmail showed up.
Even after the tremendous rise of Gmail, Hotmail still holds a remarkable pull on its loyalists. In 2012, Microsoft finally did away with the Hotmail name and rebranded its free email service as Outlook. With a new name and a changed look, Microsoft aimed to make Outlook more user-friendly and inclusive by integrating One Drive (cloud service), Office Online and Skype into its email.
Yet, for enthusiasts, it made sure that creating a Hotmail account remained possible, so it did not drop the domain name. Rest assured, the services in both the domain names are identical.
To set up your own Hotmail or outlook.com email account, just follow the steps below.
Contents [show]
Create a Hotmail/ Outlook.com Account
Step 1. Type the URL in a web browser
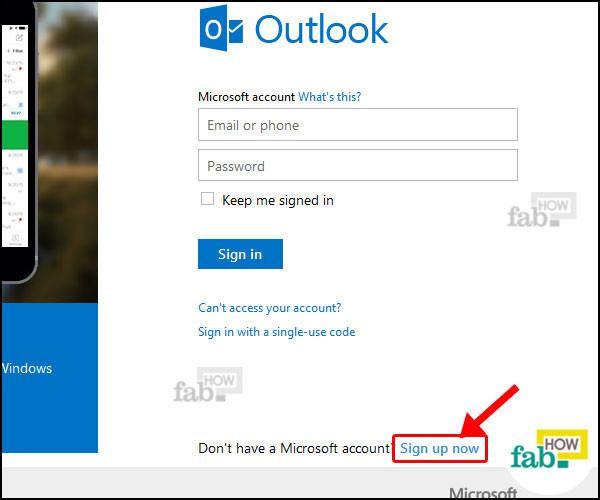
Open your web browser and type www.hotmail.com in the address bar.
Step 2. Sign up for a Microsoft account

In the bottom-right portion of the screen, click on the “Sign up now” link to open the form to create an account.
Step 3. Enter your name

Enter your first and last names in the boxes provided on the form.
Step 4. Enter a username
Enter a unique username. Remember, your username will become part of your email address. It will look like this:username@emailservice.com

If you have a common name, try different alternatives and be sure not to create a username that you would feel embarrassed providing on your résumé.
Step 5. Select the domain name
Select the domain from the drop-down menu at the end of the username box.
You can choose either outlook.com or hotmail.com, but remember that your username must not exist for the domain that you choose or you will have to change it.
Step 6. Create a password
There are several requirements for passwords. It must have at least 8 characters and it must include at least 2 of the following: uppercase letter, lowercase letter, a number and a special symbol. Type the password again to confirm it.
Step 7. Enter your country/region
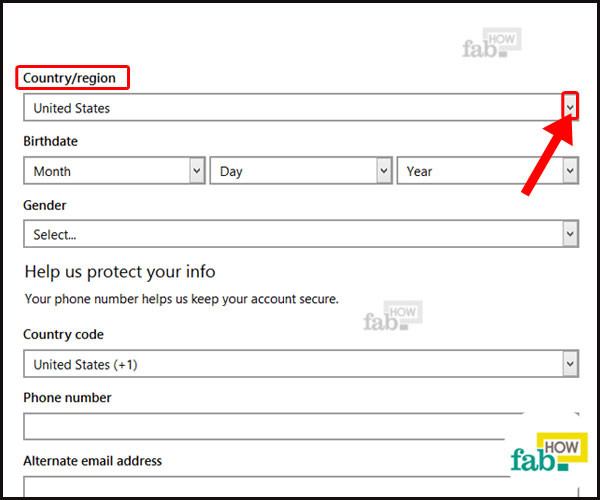
Select the country or region in which you live from the drop-down menu. United States is selected by default.
Step 8. Enter your date of birth and gender
Enter your date of birth and gender to complete your personal details.
Step 9. Enter your contact information for security
For security reasons, providing a contact number and an alternate email address will help you in the future. Out of the two, only a phone number is mandatory. You can skip the alternate email if you prefer or don’t have another one.
Step 10. Enter the CAPTCHA code
To prove that you are a human, not a virus or malware, enter the code that you see on the screen. Remember, it is case sensitive.
CAPTCHA stands for “Completely Automated Public Turing test to tell Computers and Humans Apart,” developed by Carnegie Mellon academics. It uses images to display codes that malicious software programs cannot view and retype.
If you do not want to receive promotional offers from Microsoft, uncheck the box next to the statement giving permission to send such offers. Now, click the “Create account” button.
If Outlook prompts you for a security check, click the “Send code” button and it will send a verification code to the number that you provided.
Enter the security code that you received via text in the box that appears after you request the code, and then click the “Create account” button.
Step 12. Account is created
Your account is now created. Read Outlook’s welcome text, then click the “Continue to inbox” button to get started using your new Hotmail service.
Your inbox will open, containing a welcome email from the Outlook team.
Customize Your Profile
After creating your Hotmail account, you can customize the look of your profile according to your taste and need.
Step 1. Click on the Gear icon
Click on the “gear” icon in the top-right corner of the screen, to the left of your name.
Step 2. Customize the theme color
Choose your preferred theme color from the choices in the drop-down menu.
Step 3. Click on Options for additional customization (optional)
For more advanced settings for your profile, you can select “Options” from the drop-down menu.
It will open another window with multiple options to manage. However, if you are new to email services, you can leave this step for some other day.
Step 4. Customize your profile
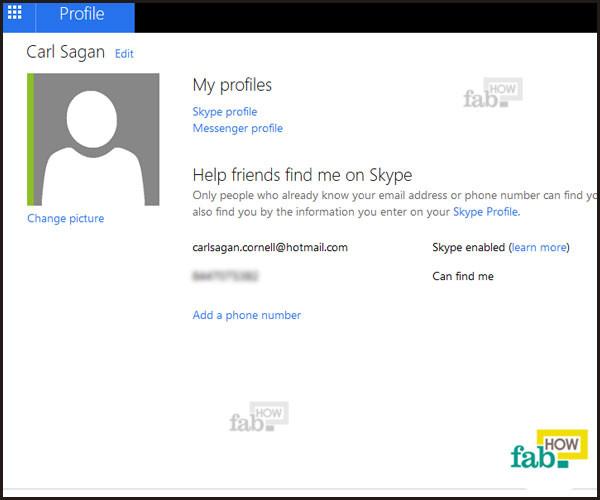
In the top–right corner, you can see the silhouette of a person. Click on it and select “Edit profile”.
A prompt will appear asking you to add your number to Skype to enable calling people over the Internet using the Skype service. Click the “Add” button if you want to use this service, otherwise click on “No thanks”.
When the edit profile window opens, click the “Change picture” link below the silhouette.
A new “Picture” window will open. Click the “Browse” button to open the “File Upload” window. Search and select a suitable picture, then click the “Open” button.
After the photo uploads, select the area of the picture that you want to appear on your profile and click the “Save” button.
Import Contacts
You can add your existing contacts to your new Hotmail account. Microsoft offers a way to add people through social media and other email services.
Step 1. Open the People application
Click on the “grid” icon in the top-left corner of your inbox and select the “People” application.
The application will open in a new tab with options to connect your email account to social media channels like Twitter, LinkedIn, Google and others. By connecting to other accounts you can import contacts and emails.
Alternatively, you can import a list of contacts using a CSV file from your computer.
Step 2. Add contacts from one of your other accounts
To add your Google or any other social media account contacts to your Hotmail account, click on the applicable button.
A pop-up window will open asking you to connect to your account. Click the “Connect” button.
The window will redirect you to that account’s login page, if you are not logged in to it already. Log in to that account as usual.
Microsoft will ask for your permission to access the basic account info. Click the “Allow” button.
A confirmation message will display saying that your contacts and other details are being set up by Hotmail. Click the “Done” button.
Now, your Hotmail account is connected to your other account. This will display in the top-right corner of the screen, just below your profile picture. Follow the same steps to connect to other accounts.
Step 3. Import contacts using a CSV file from your computer
Under the ‘Import contacts’ section, click on the “Start import” button.
It will show you multiple options like Google, Outlook and Windows Live Mail from which to import contacts. To import using a CSV file from your computer, select “Other”.
Click the “Browse” button to open a File Upload window and search for your contacts CSV file. Select and open the file, then click the “Upload” button.
Sign Out of Hotmail/ Outlook
When you’re done, you should sign out of your email account, especially if you are accessing it on a device that is used by others.
Step 1. Click on your profile picture
Click on your profile picture in the top-right corner to open the profile menu.
Step 2. Click on Sign out
At the bottom of the profile drop-down menu, select the “Sign out” option. Your Hotmail account will be signed off.


Không có nhận xét nào:
Đăng nhận xét